Fruit Kiwi Burfi is a modern fusion dessert that combines the richness of traditional Indian burfi with the fresh, tangy flavor of kiwi. Its vibrant green color, soft texture, and mildly sweet–tangy taste make it an attractive sweet for parties, festivals, and special occasions. This burfi is easy to prepare, requires simple ingredients, and is perfect when you want to try something unique yet familiar.
Below is a clear, step-by-step Fruit Kiwi Burfi recipe, explained in detail so you can make it confidently at home.
Ingredients (Makes 16–20 Pieces)
- Ripe kiwi fruits – 4 large
- Sugar – ¾ cup (adjust to taste)
- Milk powder – 1 cup
- Fresh cream (malai) – ¼ cup
- Ghee – 2 tablespoons
- Cornflour – 1½ teaspoons
- Cardamom powder – ¼ teaspoon (optional)
- Chopped pistachios or almonds – 2 tablespoons (for garnish)
Step 1: Preparing the Kiwi Pulp
Wash the kiwi fruits thoroughly. Peel off the skin using a knife or peeler. Chop the kiwi into small pieces.
Transfer the chopped kiwi into a mixer jar and blend into a smooth puree. Do not add water. Kiwi naturally contains moisture, which is enough.
Strain the puree using a fine sieve to remove seeds. This step is optional but recommended for a smooth burfi texture.
Step 2: Cooking the Kiwi Puree
Take a heavy-bottom pan and add the prepared kiwi puree. Cook it on low to medium flame, stirring continuously.
After 3–4 minutes, add sugar and mix well. The mixture will become slightly watery as the sugar dissolves. Continue cooking until the mixture thickens slightly and the raw fruit smell disappears.
⚠️ Important: Always cook kiwi on low flame. High heat may change the color and taste.
Step 3: Preparing the Milk Base
In a small bowl, mix milk powder, fresh cream, and cornflour until smooth and lump-free. This mixture helps give the burfi a soft yet firm structure.
Add this milk mixture slowly to the cooked kiwi puree while stirring continuously.
Step 4: Thickening the Burfi Mixture
Add ghee to the pan and continue stirring on low flame. The mixture will start thickening gradually.
Cook for 8–10 minutes, stirring continuously to avoid sticking or burning. The mixture should become thick, glossy, and start leaving the sides of the pan.
Add cardamom powder if using and mix well.
Step 5: Setting the Burfi
Grease a tray or plate lightly with ghee. Pour the thick kiwi burfi mixture into the tray.
Spread it evenly using a greased spatula. Tap gently to remove air bubbles.
Sprinkle chopped pistachios or almonds on top and press lightly.
Step 6: Cooling and Cutting
Allow the burfi to cool completely at room temperature for 1–2 hours. Once set, cut into square or diamond-shaped pieces using a sharp knife.
For best results, refrigerate for 30 minutes before cutting for clean edges.
Serving Suggestions
- Serve Fruit Kiwi Burfi chilled or at room temperature
- Perfect for festive platters, birthday parties, and gifting
- Pair with other colorful fruit-based sweets for variety
Storage Tips
- Store in an airtight container
- Refrigerate to maintain freshness
- Stays good for 4–5 days in the refrigerator
Tips for Perfect Kiwi Burfi
- Use ripe but firm kiwis
- Always cook on low flame
- Stir continuously to avoid lumps
- Do not add water while blending kiwi
- Adjust sugar based on fruit sweetness
Variations You Can Try
- Kiwi Coconut Burfi: Replace half milk powder with desiccated coconut
- Kiwi Khoya Burfi: Use crumbled khoya instead of milk powder
- Sugar-Free Version: Use stevia or sugar-free sweetener
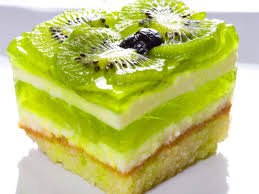
- Layered Burfi: Add a white milk layer for contrast
Health Benefits
- Kiwi is rich in Vitamin C and antioxidants
- Milk powder provides calcium and protein
- Lighter than traditional khoya-based sweets
- Refreshing taste, especially in summer
Conclusion
Fruit Kiwi Burfi is a beautiful example of how traditional Indian sweets can be reinvented with modern, fruity flavors. Its bright color, soft texture, and refreshing taste make it a crowd-pleaser, especially among kids and guests looking for something different. With simple ingredients and careful cooking, you can easily prepare this unique burfi at home and add a creative touch to your dessert table.
Do Follow Us on Instagram